Recently, I was working on a project with some other engineers, & we needed a way to keep track of our switch configurations. If you are coming from a network background where version control basically meant saving files like Router_Config_Final_v2_USE_THIS.txt, managing configs this way can get really messy. If we want to manage our files effectively, a better way to do it is to use Git. Now, let us understand what exactly Git is & how we can set it up.
Git vs. GitHub: Let’s clear the confusion
Before we install anything, we need to understand the difference between Git & GitHub. A lot of beginners get confused here. Git is just a small tool that sits on your local computer. It’s only job is to track changes in your files over time. Git is completely local & gives you a structured undo button. GitHub, on the other hand, is just a hosting service on the internet where you can store your Git repositories. Think of it like this, Git is the camera you use to click photos, & GitHub is like Google Photos where you upload them for backup. If your laptop crashes, your local Git history is gone. but if you’ve been pushing those snapshots to GitHub, your work is perfectly safe.
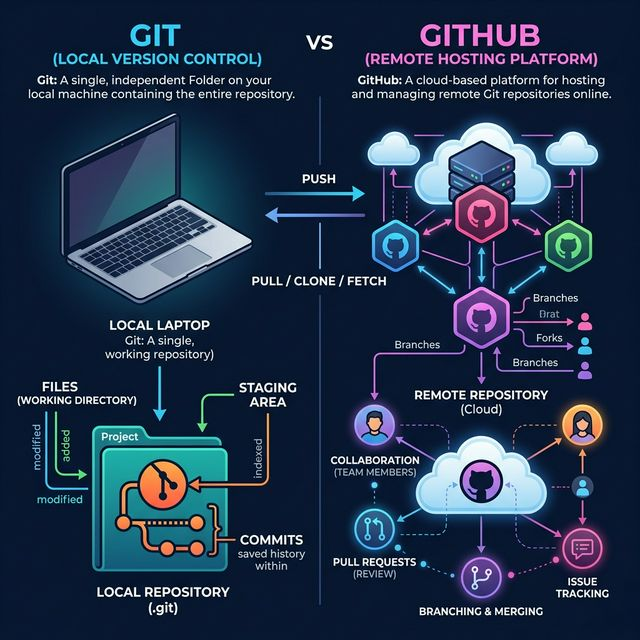
Installing Git on your machine
Now, I am going to install Git on my machine. Since it is open-source, getting it is pretty straightforward. For Windows: You can go to git-scm.com & grab the .exe file. When you run the installer, you’ll see a bunch of checkboxes. Just leave the defaults as they are. It has to be noted, that you should keep “Git Bash” selected, as it gives you a really nice Linux-like terminal right inside Windows.
For Mac: I am going to use Homebrew to install it on Mac.
brew install git
Alternatively, you can just type git --version in the terminal & macOS will automatically prompt you to install it if it’s missing.
For Linux:
I am going to use apt-get for Ubuntu/Debian
sudo apt-get update && sudo apt-get install git

 For CentOS/RHEL/Fedora
sudo dnf install git
Verifying the Installation using the CLI
Now, there are plenty of GUI tools out there for Git, but if you really want to understand how things work under the hood, we have to use the Command Line Interface (CLI). I am going to open my terminal (or Git Bash if you are on Windows) & run the below command to check if everything installed correctly.
git --version
Output:
git version 2.43.0.windows.1
Now, I can see the version number, which means the installation was successful. Even though you have installed Git, you will notice that it doesn’t automatically start tracking your files. The problem here is that you need to explicitly tell Git which folders to initialize. In the next article, we will take a folder & run some commands to actually get our hands dirty with tracking files locally.